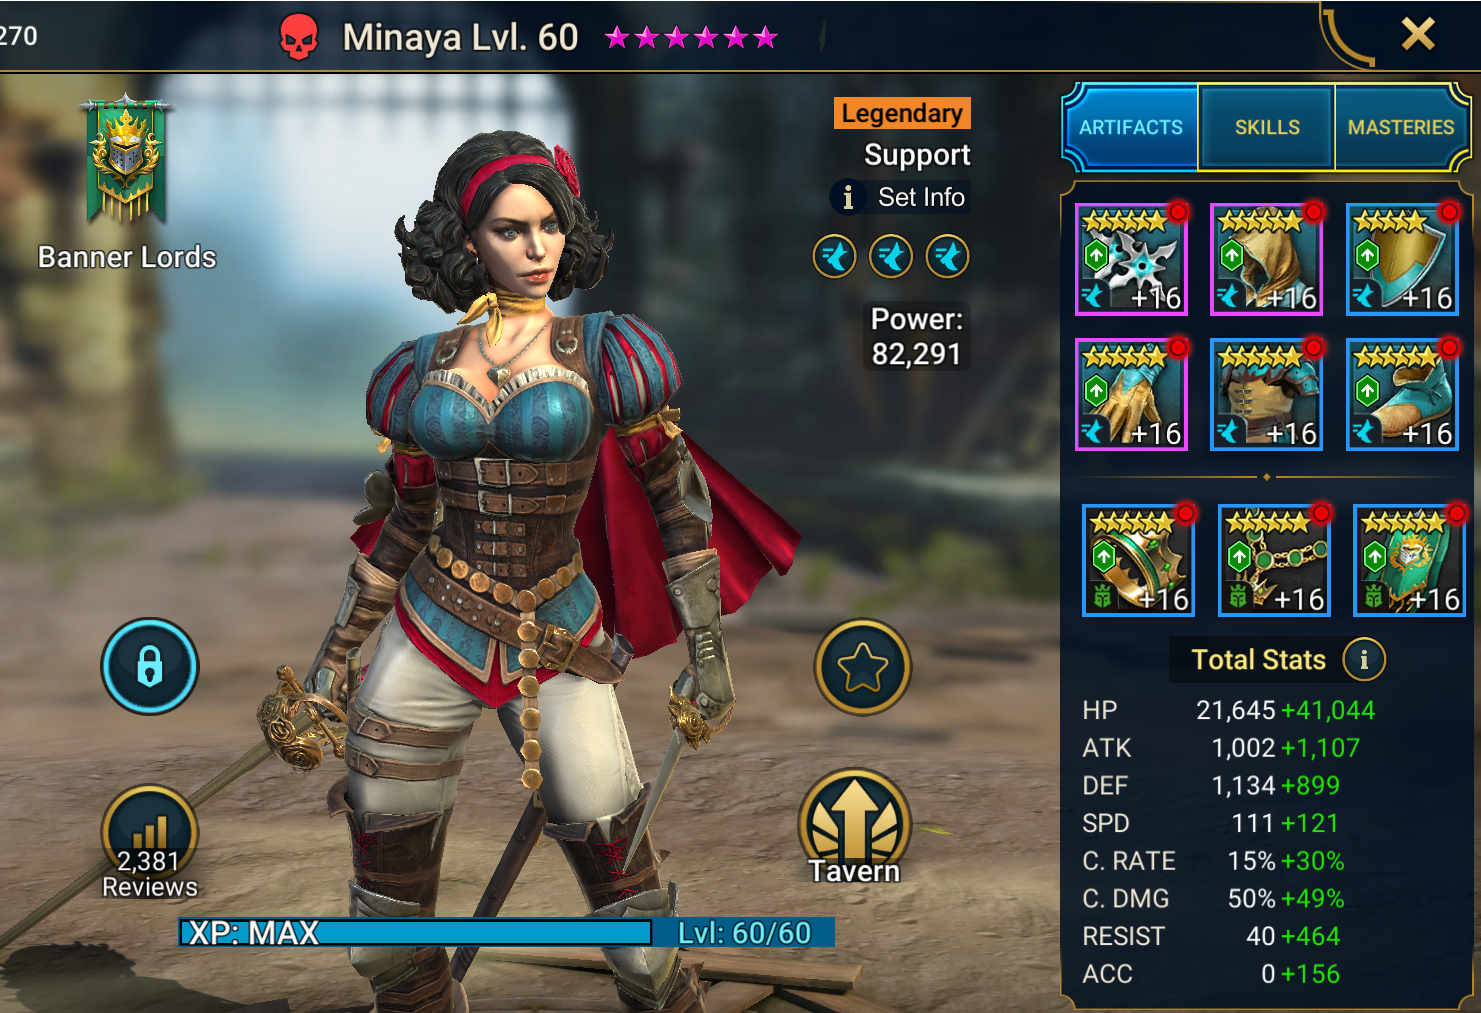
Minaya is a legendary force affinity champion from the Banner Lords faction in Raid Shadow Legends. She is a great support champion, able to provide impressive healing to your team. Her A1 provides a continuous heal, while her A2 provides a base heal of 10,000 hit points, her A3 also provides a heal to all members of the team. This A3 also places a block debuff if your team mates already have an increase def buff placed.
Players will find that Minaya is successful in a number of different areas as a support type champion. Although, she can be used very effectively in the Arena and the Doom Tower. In this guide we will provide a section for each; Arena and Doom Tower. In which we will explore in detail, individual setups for masteries, gear and stats and team compositions.
Minaya Stats Overview

- Faction: Banner Lords
- Type: Support
- Affinity: Force
- Rarity: Legendary
- HP: 21645
- Attack: 1002
- Defense: 1134
- Critical Rate: 15
- Critical Damage: 50
- Speed: 111
- Resistance: 40
- Accuracy: 0
- Aura: Increase Ally SPD in by 19
- Books to Max Skills: 16
Minaya Skills Overview
A1: Graceful Guide
Attacks 1 enemy. Places a 15% [Continuous Heal] buff on the ally with the lowest HP for 2 turns.
Upgrades as follows:
- Level 2: Damage +5%
- Level 3: Damage +5%
- Level 4: Damage +5%
- Level 5: Damage +5%

A2: Mending Ways
Attacks 1 enemy. Heals this Champion and the ally with the lowest HP by 10,000 HP. Has a 75% chance of placing a 100% [Heal Reduction] debuff on all enemies for 2 turns.
Upgrades as follows:
- Level 2: Damage +10%
- Level 3: Damage +10%
- Level 4: Damage +10%
- Level 5: Buff/Debuff Chance +10%
- Level 6: Buff/Debuff Chance +15%
- Level 7: Cooldown -1

A3: Beauty’s Allure
Heals all allies by 40% of their MAX HP. Places a [Block Debuffs] buff for 2 turns on Champions under [Increase DEF] buffs. If a Champion is fully healed by this Skill, also places a [Shield] buff on them for 2 turns equal to 25% of the Champion’s HP.
Upgrades as follows:
- Level 2: Heal +10%
- Level 3: Heal +10%
- Level 4: Cooldown -1
- Level 5: Cooldown -1
![Lovers-Sacrifice-P Lover's Sacrifice [P]](https://www.gamingelephant.com/wp-content/uploads/2023/12/Lovers-Sacrifice-P.png)
A4: Lover’s Sacrifice [P]
Fills the Turn Meters of all allies by 20% when this Champion is killed. Revives this Champion with 75% HP when killed if Khoronar is on the same team.
Upgrades as follows:
- Level 2: Cooldown -1
- Level 3: Cooldown -1
Minaya Arena Build Guide
Minaya can function well as a healer, and the masteries revolve around her burst healing. This build is primarily oriented at Arena and the goal is to make her as tanky as possible with high Resistance. Paired with Khoronar she can stand her ground in Gold tier in both classic and 3×3 Tag Team.
Skills
A2 and A1 do not require to be booked. Her A3 is good and can be booked if you don’t have better legendary candidates as it’s her bread and butter and lower cooldown is most welcome. Unlike most champions, her A2 scales based on a set amount of health, which is very good for low health allies. It falls off when you have tanky units, but this is compensated by the A3. Because of this A2 is recommended if you need a heal immediately and the A3 is on cooldown, or, if you want to go for a chance at the Block healing. In most cases, A1 will be better. It CAN weak hit, and if it does, you will NOT place a Continuous Heal. Best scenario for Minaya is being in a team with very high health targets, as both her A1 and A3 scale based on max health.
Masteries
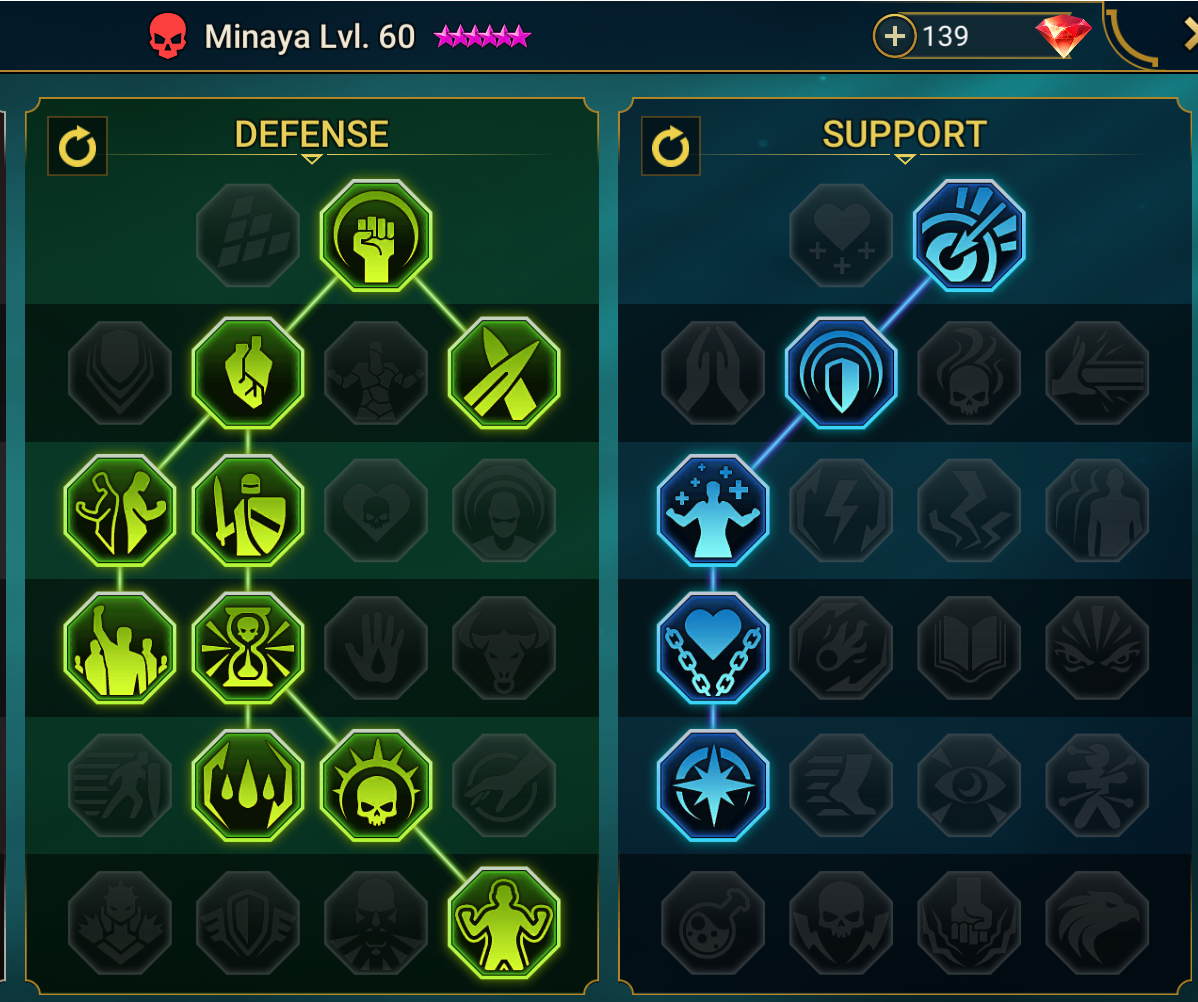
Due to this we focus on the Support and Defense trees. The Support tree offers a little bit of Accuracy for her A2 but mainly increases the healing she does in both her A2 and A3. The Defense tree provides her with decent survivability, especially with masteries like Delay Death and Resurgent being more effective in prolonged fights.
The two key masteries on the defense tree however are the Retribution and Unshakable. Minaya’s A1 puts a continuous heal on the ally with the lowest health and being able to counter attack after surviving the first attack provides a lot of extra healing to sustain your team. For a similar reason, we take Cycle of Revenge for Turn meter boost, giving minaya extra turns for more healing and cycling to A3 as quickly as possible. Finally, Unshakable is taken due to her being used in a slow/stall team, so resisting enemy debuffs is important.
Gear & Stats Build
The aim of this build is to sustain and outlive the enemies in arena so the key stats to focus on are HP and Resistance. We don’t care too much about Accuracy. Shield set is recommended for mutliple purposes as it provides protection for the whole team. Relentless and Speed sets are good to cycle turns for the A1 and A3. Stoneskin and Stalwart sets are decent for arena vs typical AoE nukers like trunda or candraphon. Assuming you could get the stats from the set, both Reflex and Immortal sets are good on her as well.
Minaya has good base health, so scaling her HP is relatively easy, and provides more effective health than defense, especially since her base defense is so low. We don’t care about any damage stats on her. Also, because the aim is to cycle her turns speed is an important stat, and you should aim to get as much Speed as you can while still maintaining resistance and health. You should aim for roughly 500-700 Resistance depending on the Arena tier you’re operating in and around 80k HP to get the full benefit from the shield Set.
Recommended Main Stats
- Glove: HP%
- Chest: Resistance
- Boots: Speed
- Ring: HP
- Amulet: HP
- Banner: Resistance

Arena Strategy & Tactics
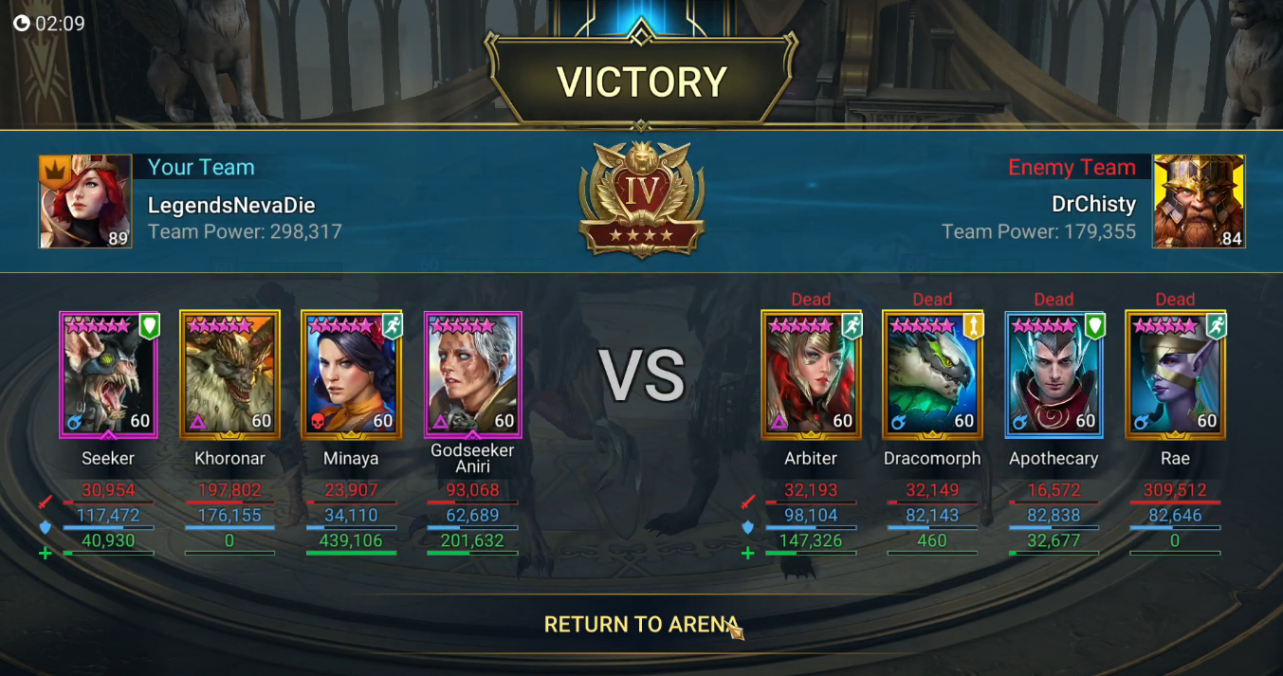
Minaya is an decent healer for game progression. What differentiates her is the ability to burst heal and her synergy with Khoronar that makes her a suitable choice for arena both on offence and defence. Her A3 is a strong part of her kit, especially coupled with Godseeker Aniri’s passive. It is capable of topping everyones HP in one turn. Low base defense and high cooldown on the skill are her downside. Because of her passive with Khoronar (she will instantly revive) along with godseekers passive reviving she can survive most attacks and since she is fast and her A3 will instantly top her back up.
Team Composition & Roles
She is used in a go-second team to wear down enemies and let Khoronar take care of the enemies using his counterattacking abilities and CC as needed. Seeker is taken for the Def lead and the passive that grants Def up for allies when attacked. Finally, Aniri is used for revive and healing.
Minaya is a pure healer and you really need to avoid Block healing, unless you are sure you can Resist it, so champs like tormin really need to be avoided, especially because she places lot of buffs and has a chance to get frozen. Another type of team that absolutely annihilates the Minaya + Khoronar combo are teams with fast champions that have block debuffs on them either with skills or sets, e.g. Siphi or teams in immunity gear. If you are using the shield set you should definitely watch out for buff strip champions like Serris, Sethalia, Kimi and so on.
Minaya Doom Tower Build Guide
Bommal Dreadhorn is one of the most difficult Doom Tower bosses and usually requires specific skill and stats to tackle him on highest difficulty on floor 90. Minaya is able to out heal the damage from the bombs – her A3 syncs on turns with the bombs explosion and it works out well.
Masteries
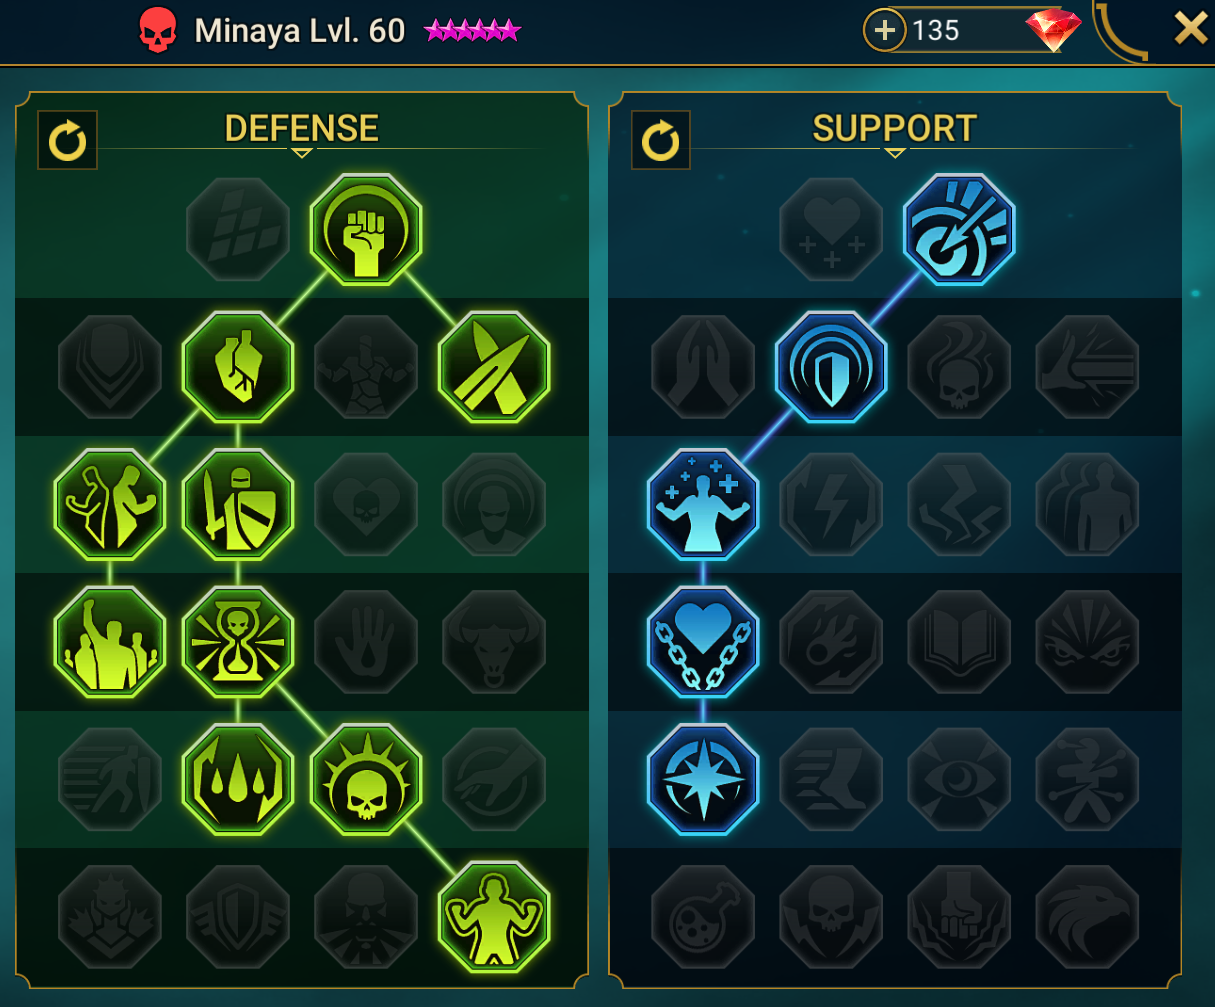
For Dreadhorn the goal is to maximize her healing on her A3, and to give her as much Resist as possible. The masteries are the same as for the arena build. We need her to be resisting the boss consistently, especially with Bommal placing bombs based on buffs he strips which can wipe your team almost instantly. Because of this, Unshakable is basically mandatory to ensure you get all the other stats – such as speed to be going at a 1:1 with the boss. The rest of the masteries are primarily to either increase healing from her A3 or reduce damage she takes.
Gear & Stats Build
The highest level bommal needs anout 490-560 Resistance (diminishing returns start at about 490, and at 560 Resistance it is estimated to be at 3%). You need to be ensuring you are going 1:1 or close to that with the boss to ensure her a3 is up for the bombs exploding, as the key source of recovering is her a3. Dreadhorn’s speed for floor 90 is 250. You do not need to match his speed as there are other factors, such as cycle of revenge from masteries as well as any turn meter boost you may take, so aim to get as close as you can.
After this, you really need to just focus on health. Although the bombs the boss summons scales based on health, so does her a3 and continuous heals. You need to make sure she has enough health to be able to survive a slam from the boss in the same turn if it happens. At least 60k HP is recommended, defense is less important but still worth getting if you can. Accuracy and damage stats for this build don’t help at all.
Recommended Main Stats
- Glove: HP%
- Chest: Resistance
- Boots: Speed
- Ring: HP
- Amulet: HP
- Banner: Resistance
Bommal 90 (Hard) Strategy & Team
The team used to down bommal 90 (hard) is pseudo specific but also obtainable. This strategy uses champions many people may have access to. However, it is a manual strategy and not suitable for auto runs. The team and roles for this battle are as follows:
- Drexthar – is in deflection set to reflect bombs + HP burn application, he is the dps, any champion can replace him. Ninja or Geomancer would be good substitutes, Ninja also brings freeze, meaning you don’t need Shirimani.
- Minaya – She is here to be using her A3 after the bombs explode, the bombs deal 20% max health (40% total) when they explode while frozen, her a3 heals for 40% of max HP then places a shield.
- Shirimani – Can be replaced with Ninja, just here to freeze, she provides a bit of healing as well, however, if you use him, he can replace drexthar for HP burns, and thus opens this slot for another healer (godseeker aniri or vogoth are recommended).
- Tatura – A recent fusion, she is here for the A1 to keep the bosses accuracy down to a point where you can reliably resist all bombs (with 490-560 resistance) Scyl – Login reward, here for constant healing and can revive in case its needed, could use vrask or doompriest instead.
This team requires similar stats for all champions, you need to be able to roughly go 1:1 with the boss, all require 490+ Resistance, and high health. However, you can get away with lower health on the defense champs since the goal is to mitigate how much damage the boss himself does. You will still want decent health however, 40k+. Counter attack masteries are very important for this fight on Tatura and minaya, if tatura lands her A1 you can instead use her A2 or A3 (depending) to further reduce incoming damage. Minaya counter attacks help her sustain the team overall.
